Welcome
- Product Name : Cash Tracker
- Product Version : v1.0.0
- Email : westiti@gmail.com
Thank you for purchasing this script!
This documentation will help you install, configure, and start
using the application as quickly as possible. I recommend reading
it from beginning to end before getting started.
The application is built with Laravel, Filament,
Livewire, and Tailwind CSS. No coding knowledge is
required to use the application. Once installed and configured,
you can manage your finances directly through the intuitive
administration interface.
If you have any questions that are not covered in this
documentation, feel free to contact me using the email address
provided above. I'll be happy to help.
Thank you for purchasing our script!
Requirements
Before using the application, make sure your server meets the
required PHP and database requirements. The app does not require
any external API keys or third-party services to manage your
financial data.
- PHP version 8.4 or higher.
- Apache or Nginx server
-
The following PHP extensions should be installed and enabled:
- Bcmath
- Ctype
- cURL
- DOM
- Fileinfo
- Filter
- Hash
- JSON
- Mbstring
- OpenSSL
- PCRE
- PDO
- Session
- Tokenizer
- XML
-
mod_rewrite
enabled if using Apache.
- MySQL 8.0+ or MariaDB 10.6+
For additional details about server requirements and
deployment best practices, refer to the
official laravel documentation
Installation:
Pre-Configured Installation (No Composer Required)
This script comes fully pre-configured and optimized for quick
deployment. All required dependencies, including the vendor
directory, are already included in the package, so there is no
need to run Composer or configure a .env file.
This approach allows for a faster and more beginner-friendly
installation process—simply upload, extract, configure, and run
the application without additional setup steps.
VPS Hosting
-
Upload the
upload-vps.zip archive to
/var/www/example.com and extract it.
-
The project structure should look like this:
/var/www/example.com/
    ├── laravel/       ← full app
    ├── public/        ← web root (IMPORTANT)
-
Point Domain to public:
Apache:
DocumentRoot /var/www/example.com/public
Nginx:
root /var/www/example.com/public;
-
Set permissions:
very important for security
# Set ownership (user = owner, web server = group)
sudo chown -R $USER:www-data /var/www/example.com

# Make directories read & execute only
sudo find /var/www/example.com -type d -exec chmod 755 {} \;

# Make files read-only
sudo find /var/www/example.com -type f -exec chmod 644 {} \;

# Allow write access ONLY where needed
sudo chmod -R 775 /var/www/example.com/laravel/storage
sudo chmod -R 775 /var/www/example.com/laravel/bootstrap/cache
Shared Hosting
Note:
Shared hosting directory structures may vary depending on the
hosting provider and domain configuration. For simplicity, this
documentation assumes the following structure:
/home/username/example.com/public_html. If your
hosting uses a different path (e.g.
/home/username/public_html), simply apply the same
steps to your actual domain root directory.
Shared hosting requires a slightly different setup to keep your
application secure.
-
Upload the
upload-sh.zip archive to
/home/username/example.com and extract it.
-
The app structure should look like this:
/home/username/example.com/
├── laravel/         ← full app
└── public_html/     ← web root
-
Set permissions:
very important for security
-
Open your hosting File Manager (cPanel,
Plesk, etc.)
- Navigate to:
/home/username/example.com
-
Set the
public_html folder and its contents to:
-
(Optional but recommended) Ensure all other files in
/home/username/laravel and folders are not
writable:
-
Set the following folders to 775:
/home/username/laravel/storage
/home/username/laravel/bootstrap/cache
How to change permissions:
Right-click the folder > click Permissions > set
value to 775 > apply to all files and subfolders.
This video explains how to set permissions on cPanel (similar
steps apply to other panels):
youtube.com/watch?v=ZLEXoQUKvC4
Important:
- Do NOT set permissions to
777
-
Only
storage and
bootstrap/cache should be writable
-
The
public_html is exposed to the public and
can be subjected to attacks, so it must be
read-only (not writable).
-
Incorrect permissions may cause errors or security issues
Database Setup
-
Create a new empty MySQL database using your hosting panel.
-
Import the provided
db.sql file into the database.
Application Configuration
-
Open the following file:
bootstrap/cache/config.php
-
Edit the top section with your details:
$url = 'https://your-domain.com';
$database = 'your_db_name';
$username = 'your_db_user';
$password = 'your_db_password';
- Save the file.
Important:
- Only edit the variables at the top of the file
- Always use single or double quotes around the values
- Do NOT modify anything below that section
-
Incorrect values will prevent the application from working
Final Step
-
Open your browser and visit your domain:
https://your-domain.com
- The application should now load successfully.
Installation Complete!
Your application is now ready to use.
You can now log in to the dashboard using the email and
password:
Login page:
https://your-domain.com/login
Email: admin@admin.com
Password: 123456789
IMPORTANT: You must change the default admin
credentials immediately after first login.
Dashboard Main Page:
The application includes a feature-rich dashboard that allows you
to configure and manage many aspects of the app.
After logging in, you will be redirected to the dashboard main
page. This page provides an overview of your application,
including general information and key statistics.
https://example.com/admin/dashboard
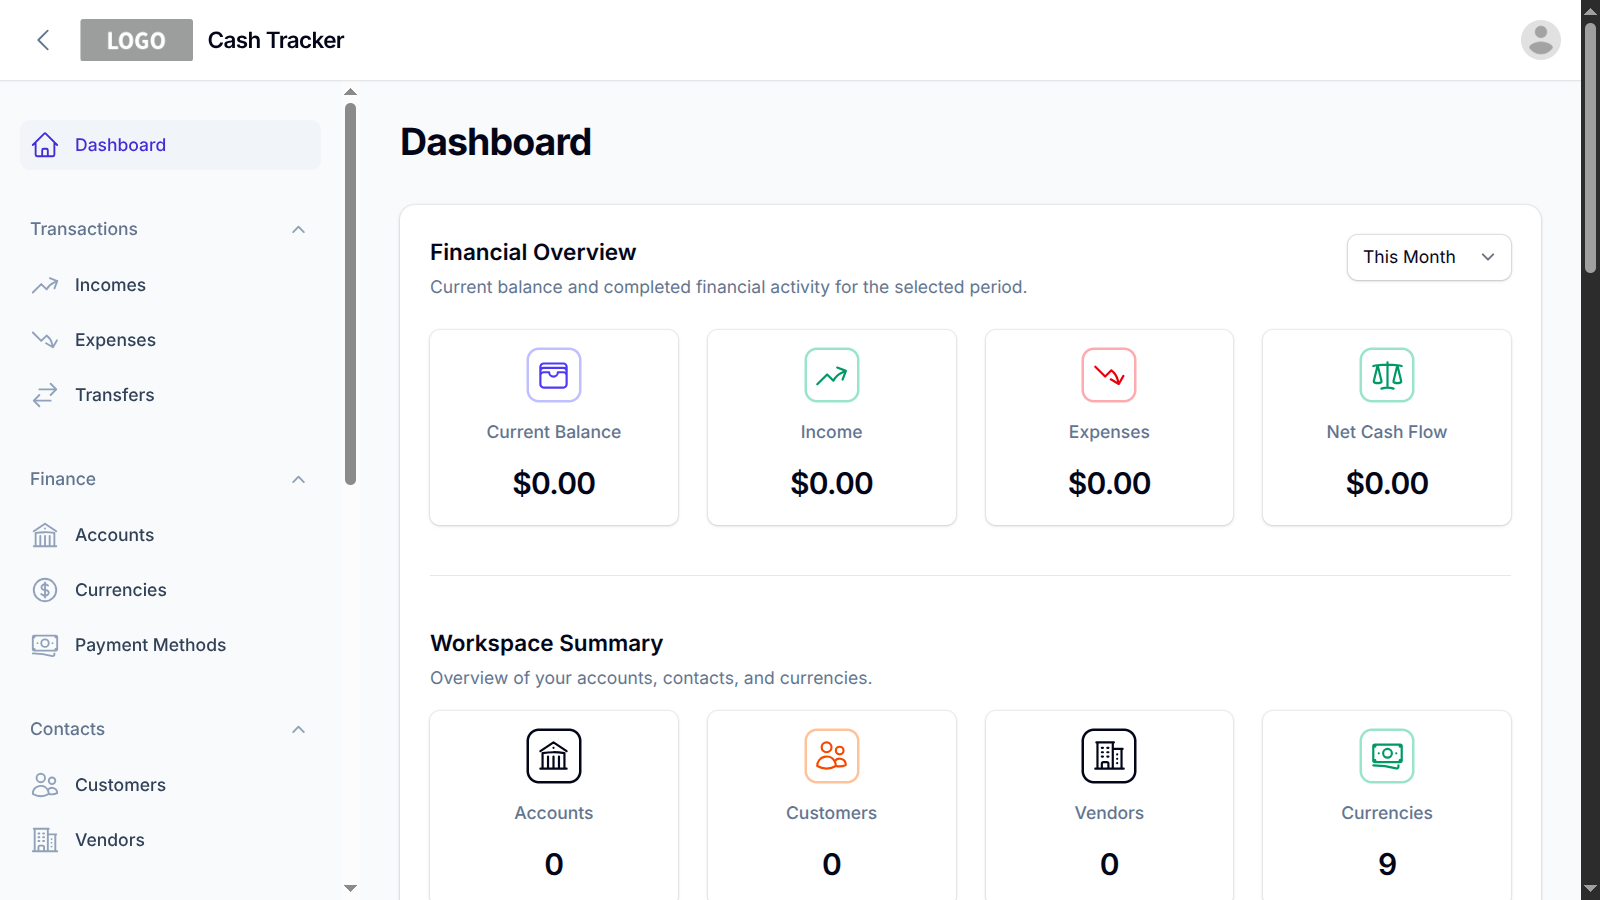
From the sidebar, you can access various settings to customize
different parts of the application.
Since the dashboard contains many configuration options,
documenting each one individually would be unnecessary. Most
settings are self-explanatory and easy to use.
To keep this documentation concise, only the most important
features are highlighted below.
Localization:
The application supports multiple languages, including:
English, Arabic, German, Spanish,
French, Hindi, Italian, Japanese,
Portuguese, Russian, Turkish, and
Chinese.
By default, English is enabled. You can activate additional
languages and manage translations directly from the dashboard.
Manage Languages
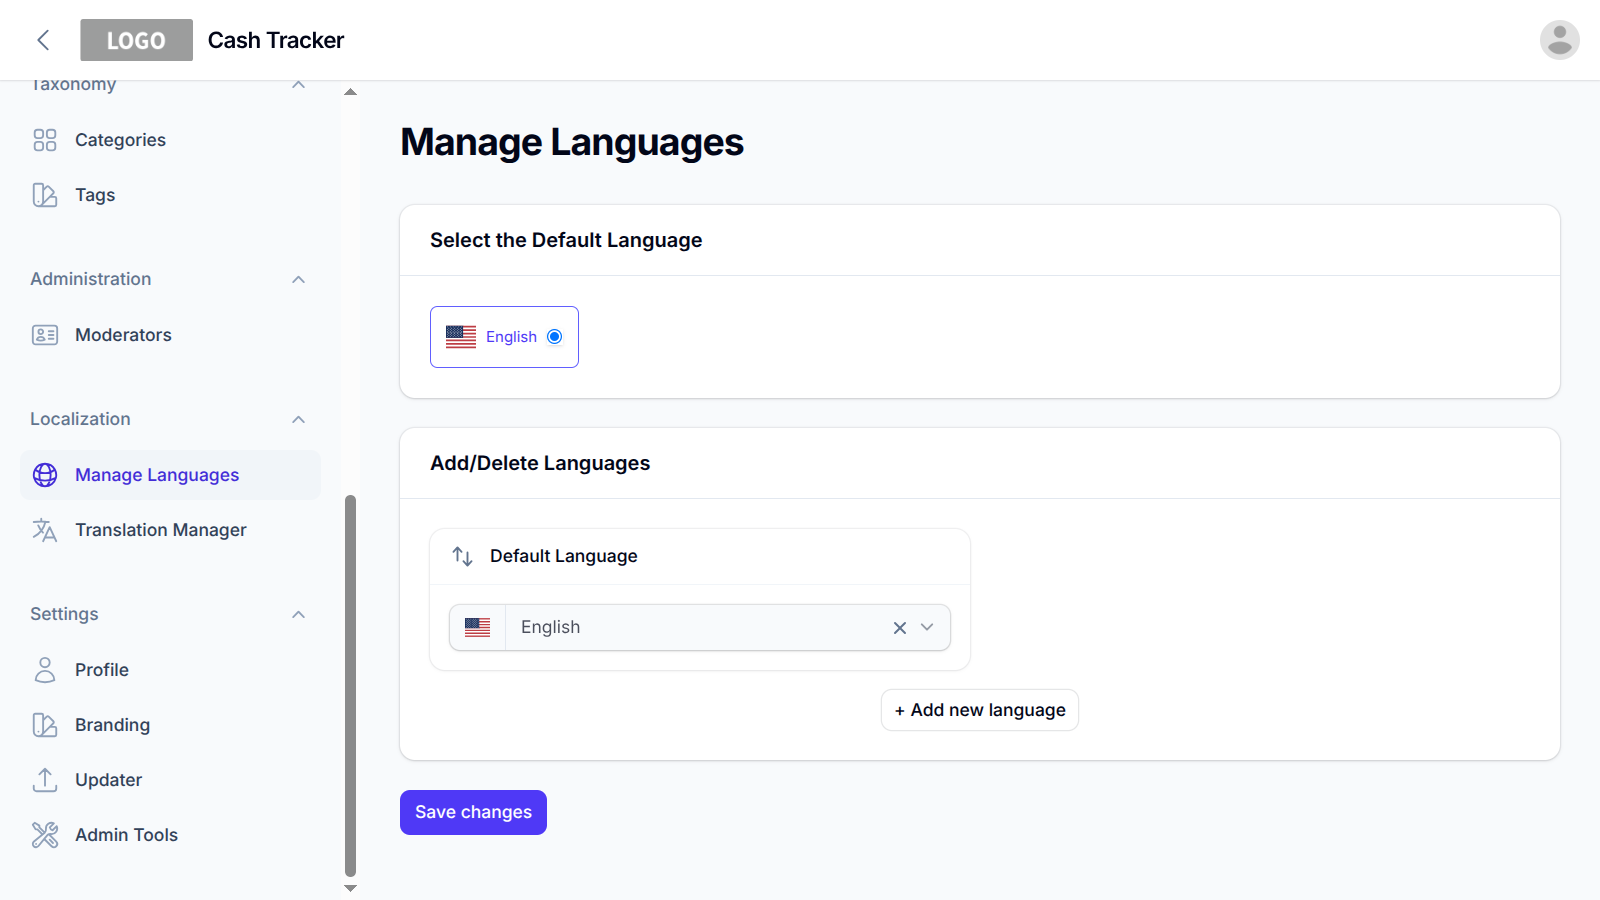
Navigate to Localization > Manage Languages:
- Set the default language
- Add or delete languages
Static Texts
Static texts are pre-defined interface strings such as button
labels, section headers, and other fixed UI elements.
To manage static translations:
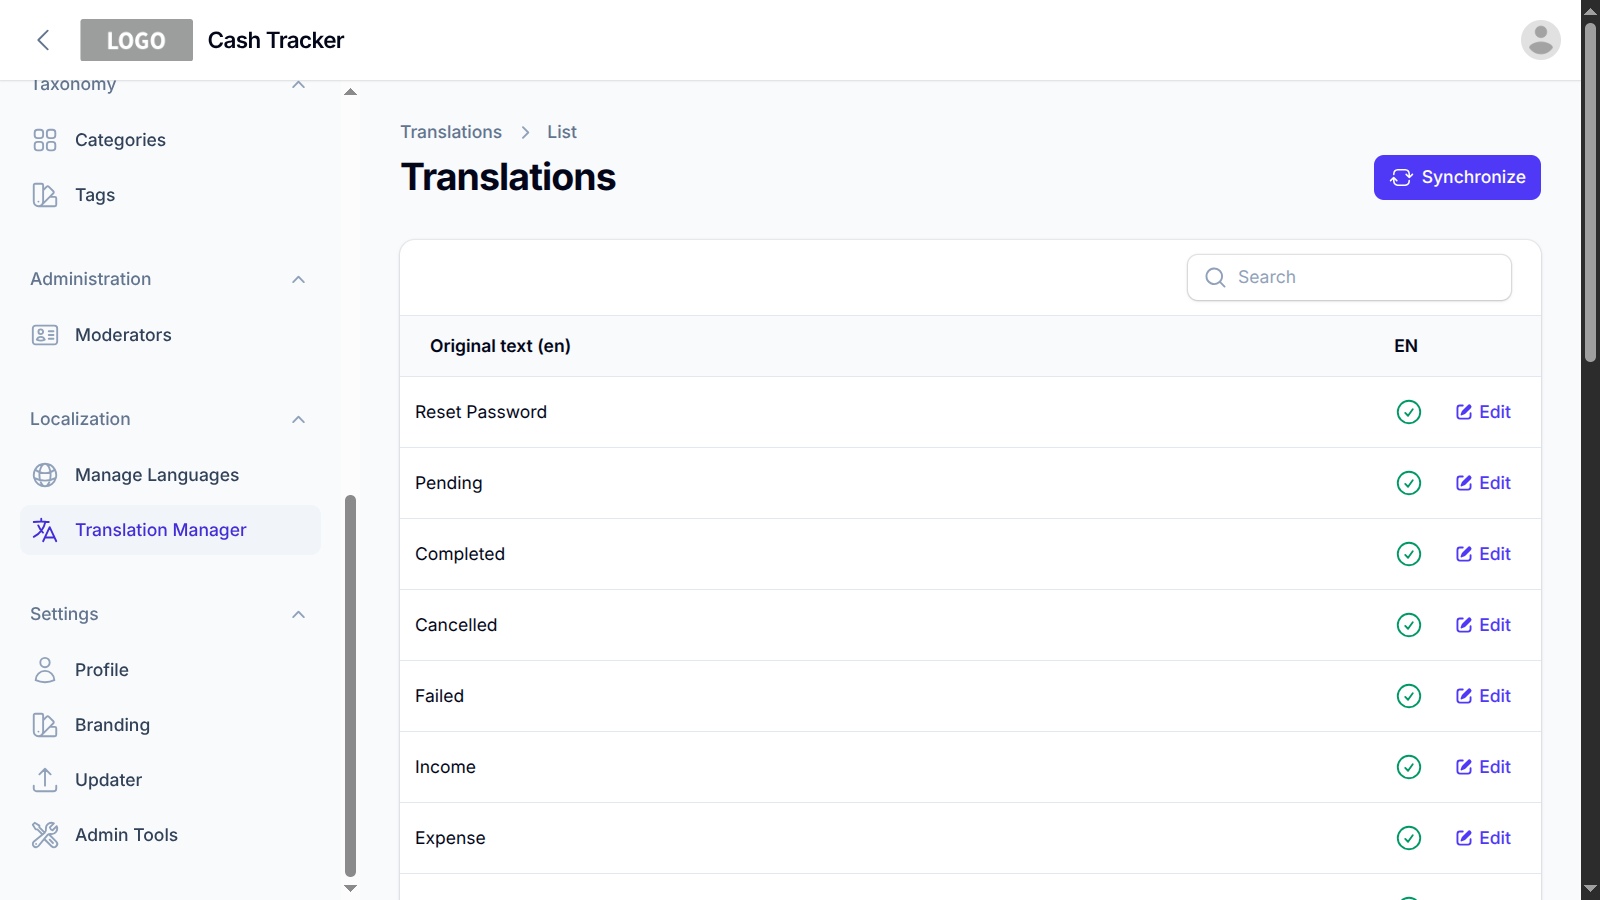
- Go to Localization > Translations Manager
-
Click Synchronize (top-right) to load all all available
text strings
-
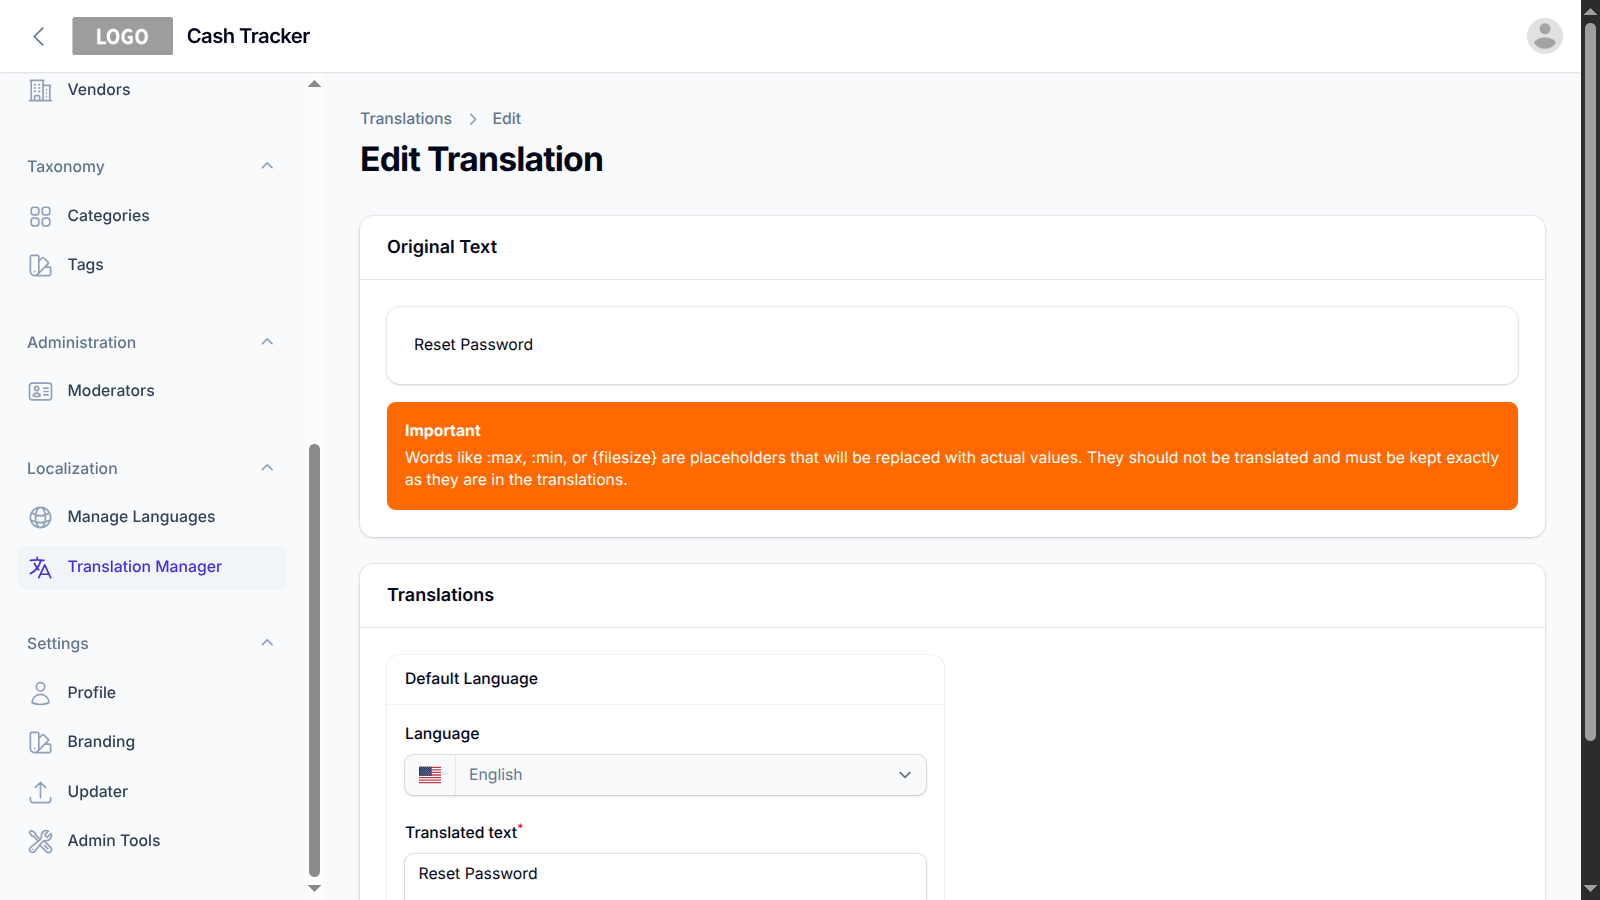
Click Edit to add or update translations for each
enabled language
-
Use the search field to quickly find specific text entries
Dashboard Main Page:
The application includes a feature-rich dashboard that provides an
overview of your financial activity and workspace.
Depending on the data available in your account, the dashboard can
display:
- Current balances for active accounts.
- Financial activity for the selected period.
- Income and expense summaries.
- Expense distribution by category.
- Transactions requiring your attention.
- Recent transactions across your accounts.
- A summary of accounts, contacts, and currencies.
Dashboard information is generated from the financial records
stored in the application.
How It Works:
Cash Tracker is designed to help you manage accounts and keep
track of income, expenses, and transfers in one place. The
application calculates account balances from the financial
activity recorded against each account.
Initial Setup
The application includes predefined currencies, a configured base
currency, common payment methods, and default categories. This
allows you to start using the application without having to
configure these items manually.
Before recording financial transactions, create at least one
account. You can then customize the predefined currencies, payment
methods, and categories according to your needs.
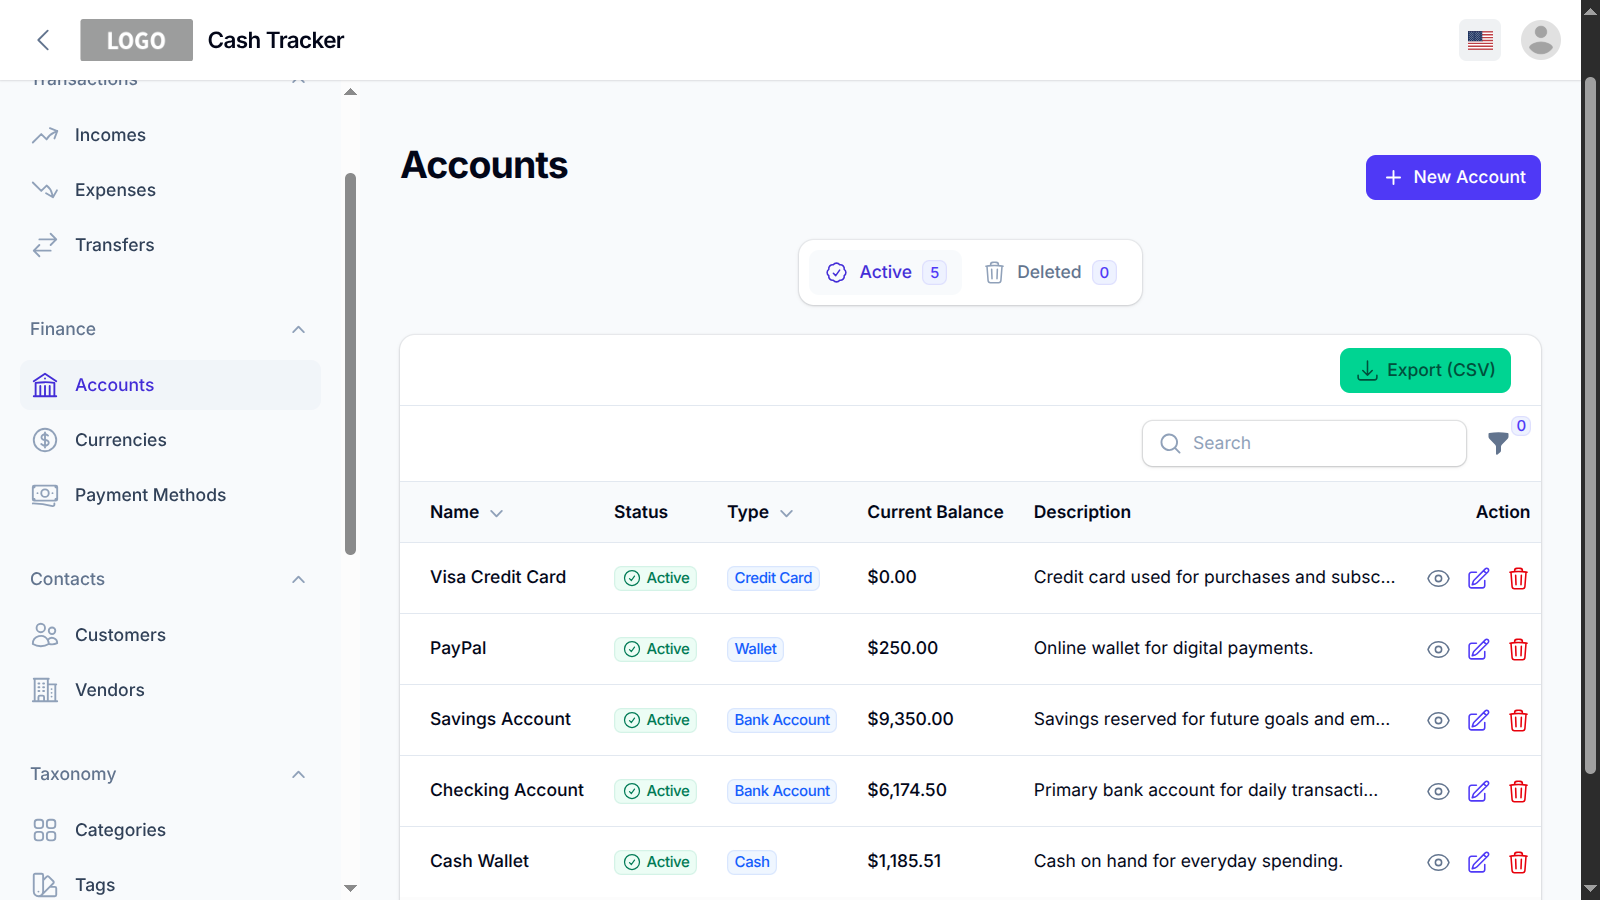
Accounts
Accounts represent where your money is held, such as bank
accounts, savings accounts, or cash accounts.
Each account has a currency, account type, and opening balance.
Income, expenses, and transfers associated with an account are
used to calculate its current balance.
Currencies
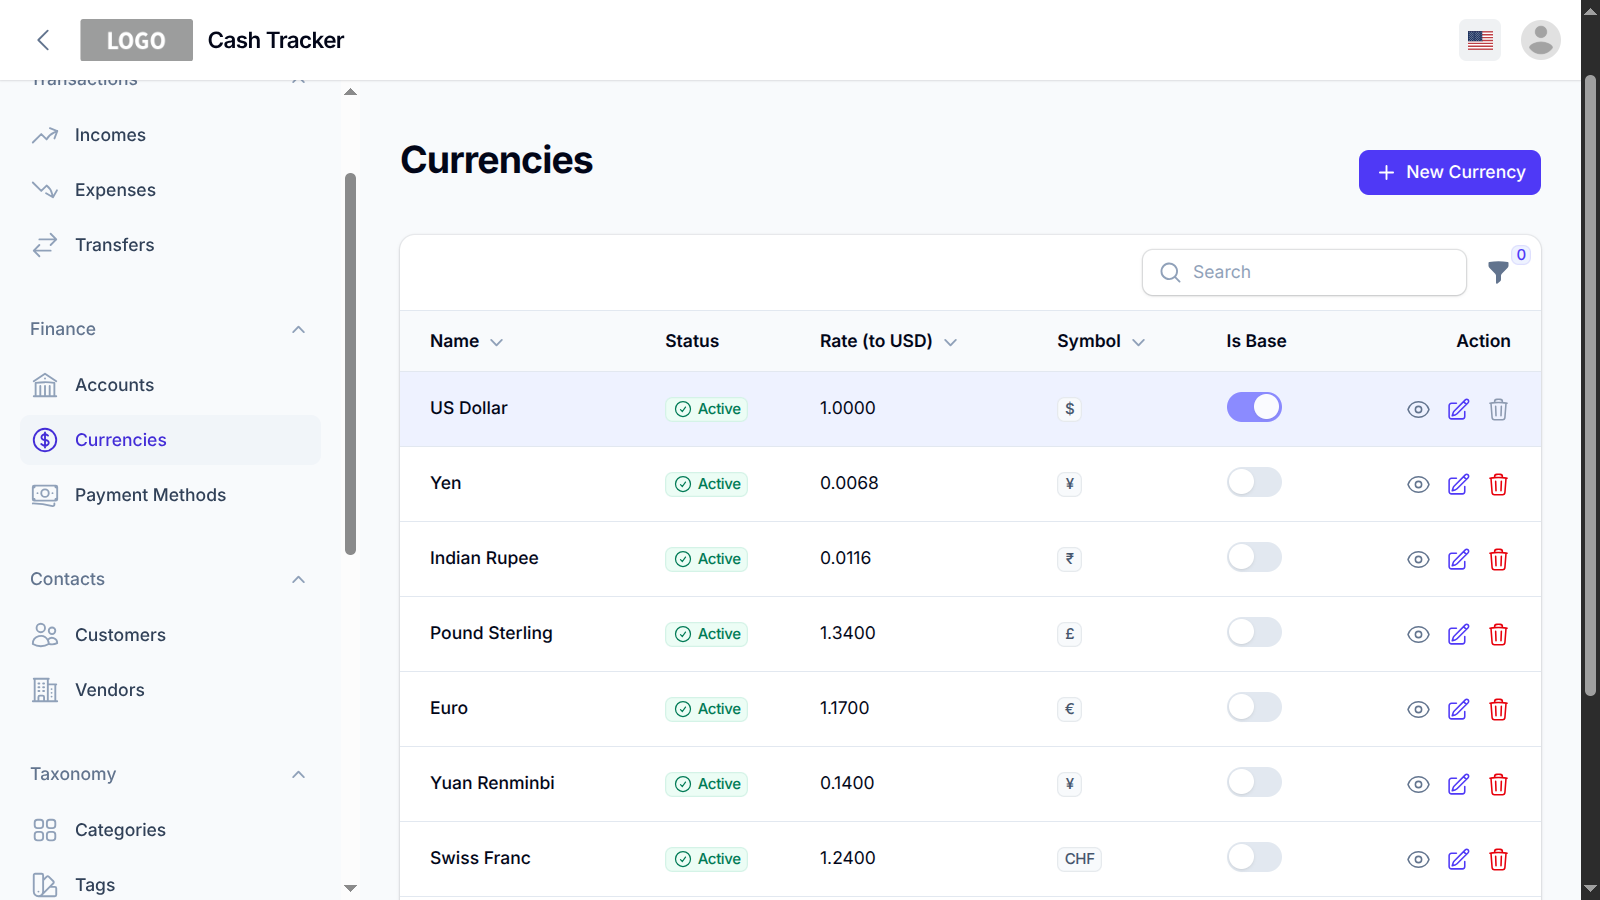
The application comes with a set of predefined currencies. A base
currency (USD) is selected during installation.
Important
All exchange rates are calculated based on the
US Dollar regardless of the base currency.
Income
Income records represent money received into an account. An income
record can include its title, amount, date, account, category,
payment method, customer, tags, and notes.
Customers are optional, so income can be recorded without
associating it with a customer.
Expenses
Expenses represent money spent from an account. An expense can
include its title, amount, date, account, category, payment
method, vendor, tags, and notes.
Vendors are optional, so an expense can be recorded without
associating it with a vendor.
Transfers
Transfers are used when moving money between two accounts within
the application.
A transfer requires two different accounts. The source account is
reduced by the transferred amount, while the destination account
is increased by the same amount.
Transfers should not be used for income or expenses. For example,
moving money from a checking account to a savings account is a
transfer.
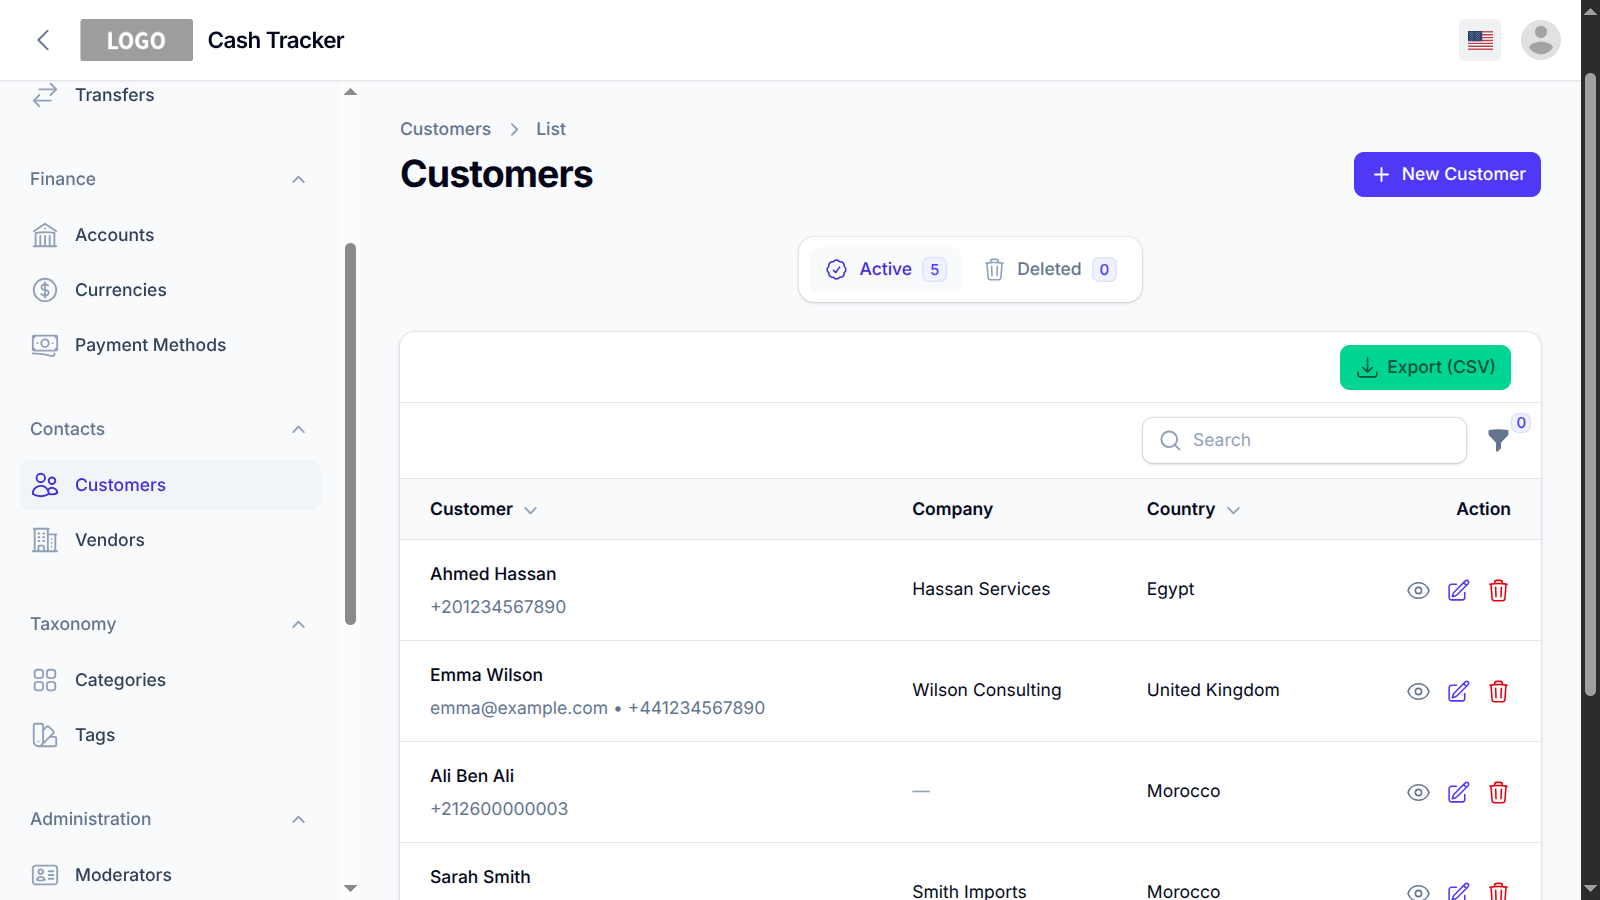
Customers & Vendors
Customers and vendors are optional contacts that can be associated
with financial transactions.
Customers are primarily used with income records, while vendors
are primarily used with expense records. They can be added
whenever they are needed.
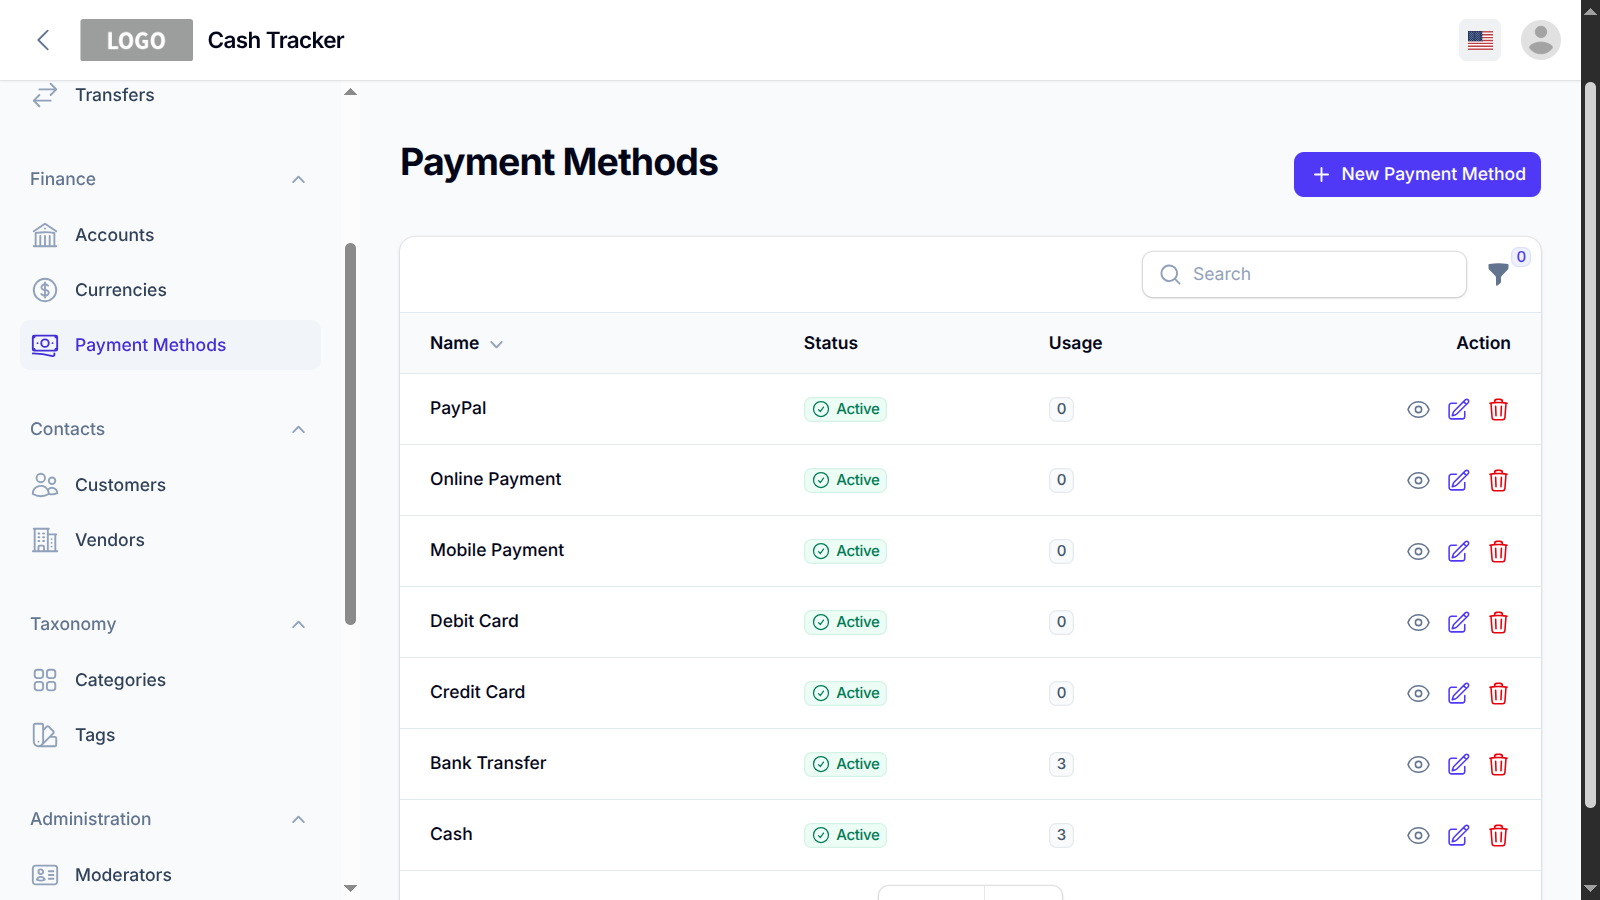
Categories, Tags & Payment Methods
Default categories and payment methods are included with the
application. You can use them immediately or customize them to
suit your workflow.
Categories help organize financial activity, while tags provide
additional flexible labels for individual records. Multiple tags
can be assigned to a transaction.
Account Balances
An account's current balance is calculated from its opening
balance and completed financial activity.
Completed income increases the account balance, while completed
expenses decrease it. Transfers decrease the source account and
increase the destination account.
Transaction Status
Transactions can remain pending until they are completed.
Completed transactions are treated as finalized financial activity
and are included in the appropriate balance and financial
summaries.
Trash & Restore
Records that support soft deletion can be moved to the trash
instead of being permanently removed.
Records in the trash can be restored later. Permanent deletion
removes the record permanently and cannot be undone.
Moderator Management:
Administrators can create and manage moderator accounts from the
administration area. Moderators can be given access to management
features without giving them full administrator privileges.
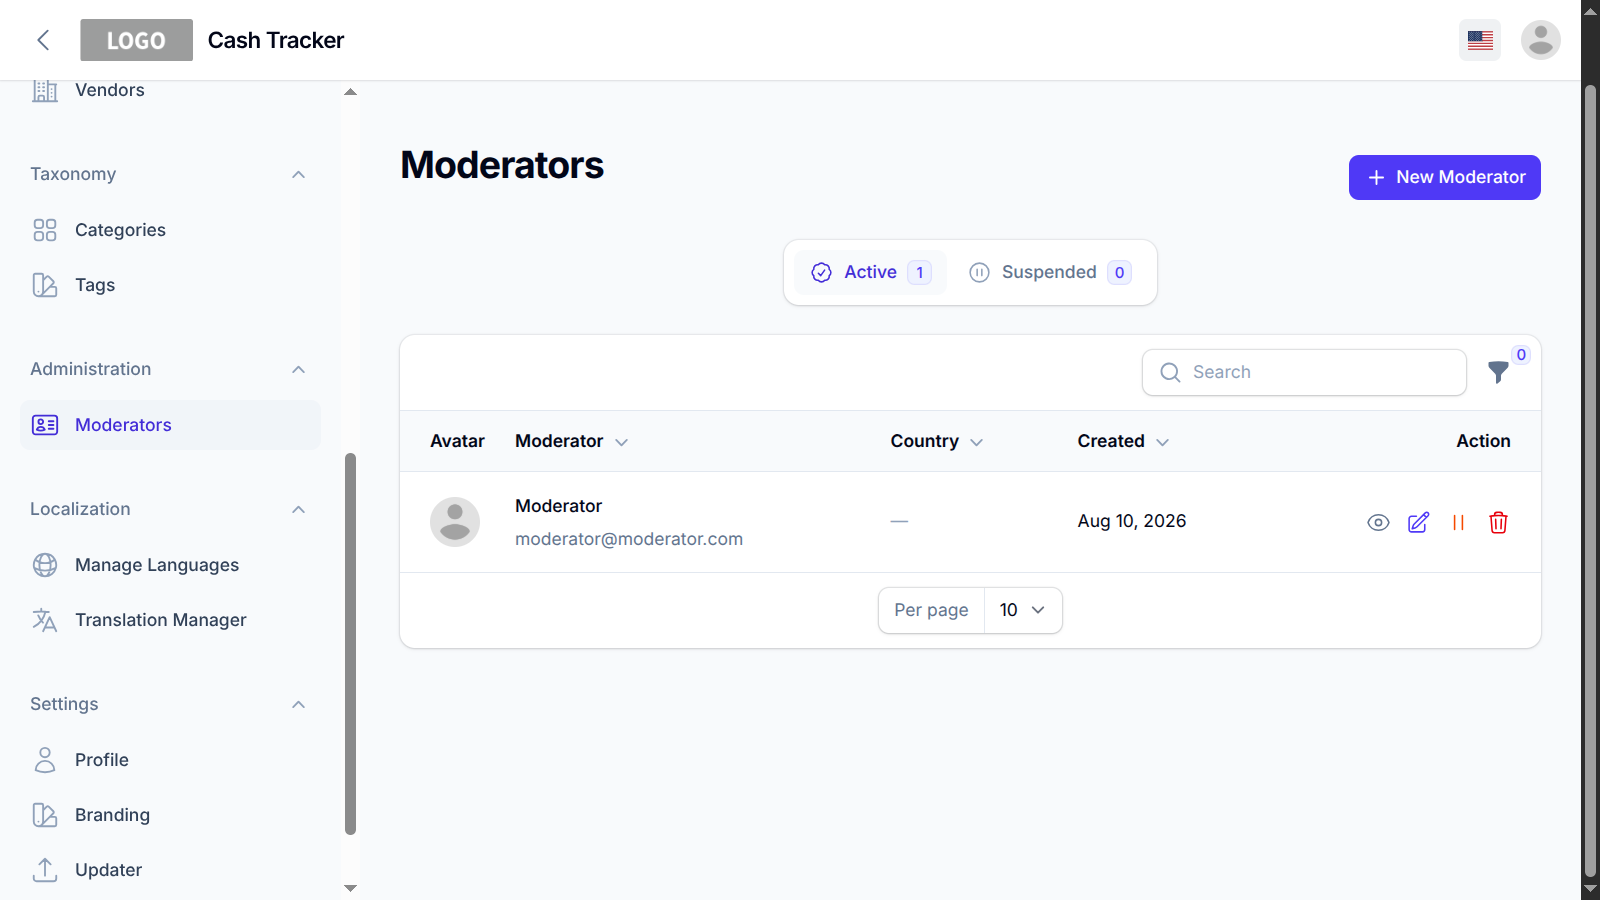
When creating a moderator, the administrator can provide the
moderator's account information and assign the appropriate role
and permissions.
Managing Moderators
Administrators can view existing moderators and manage their
accounts as needed. Available actions may include viewing,
editing, suspending, reactivating, moving a moderator to the
trash, restoring a deleted moderator, or permanently deleting the
account.
Suspending a Moderator
A moderator can be suspended when their access to management
features needs to be temporarily disabled. A suspended moderator
cannot perform management actions until the account is
reactivated.
Reactivating a Moderator
Administrators can reactivate a suspended moderator at any time.
Once reactivated, the moderator regains access to the management
features allowed by their assigned permissions.
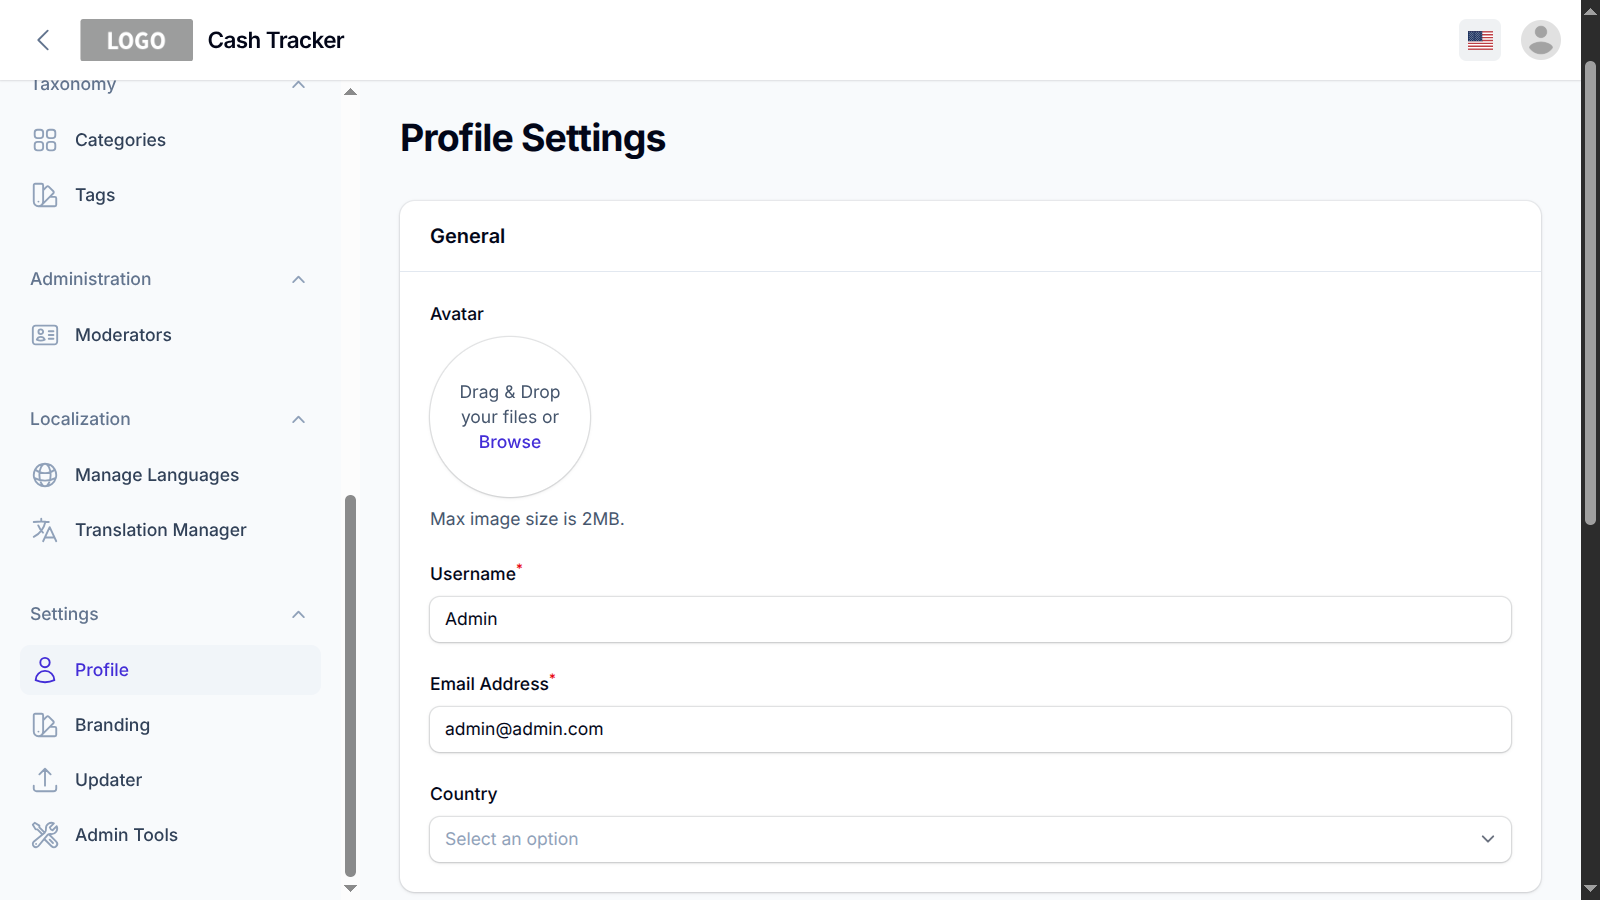
Profile & Account Management:
The Profile section allows authenticated users to manage their
personal account information.
Users can update available profile information such as their
username and email address.
Users can also update their password by providing their current
password and confirming the new password.
Application Maintenance:
The application includes maintenance tools intended for
administrators. These tools help manage application caches, logs,
database backups, and application updates.
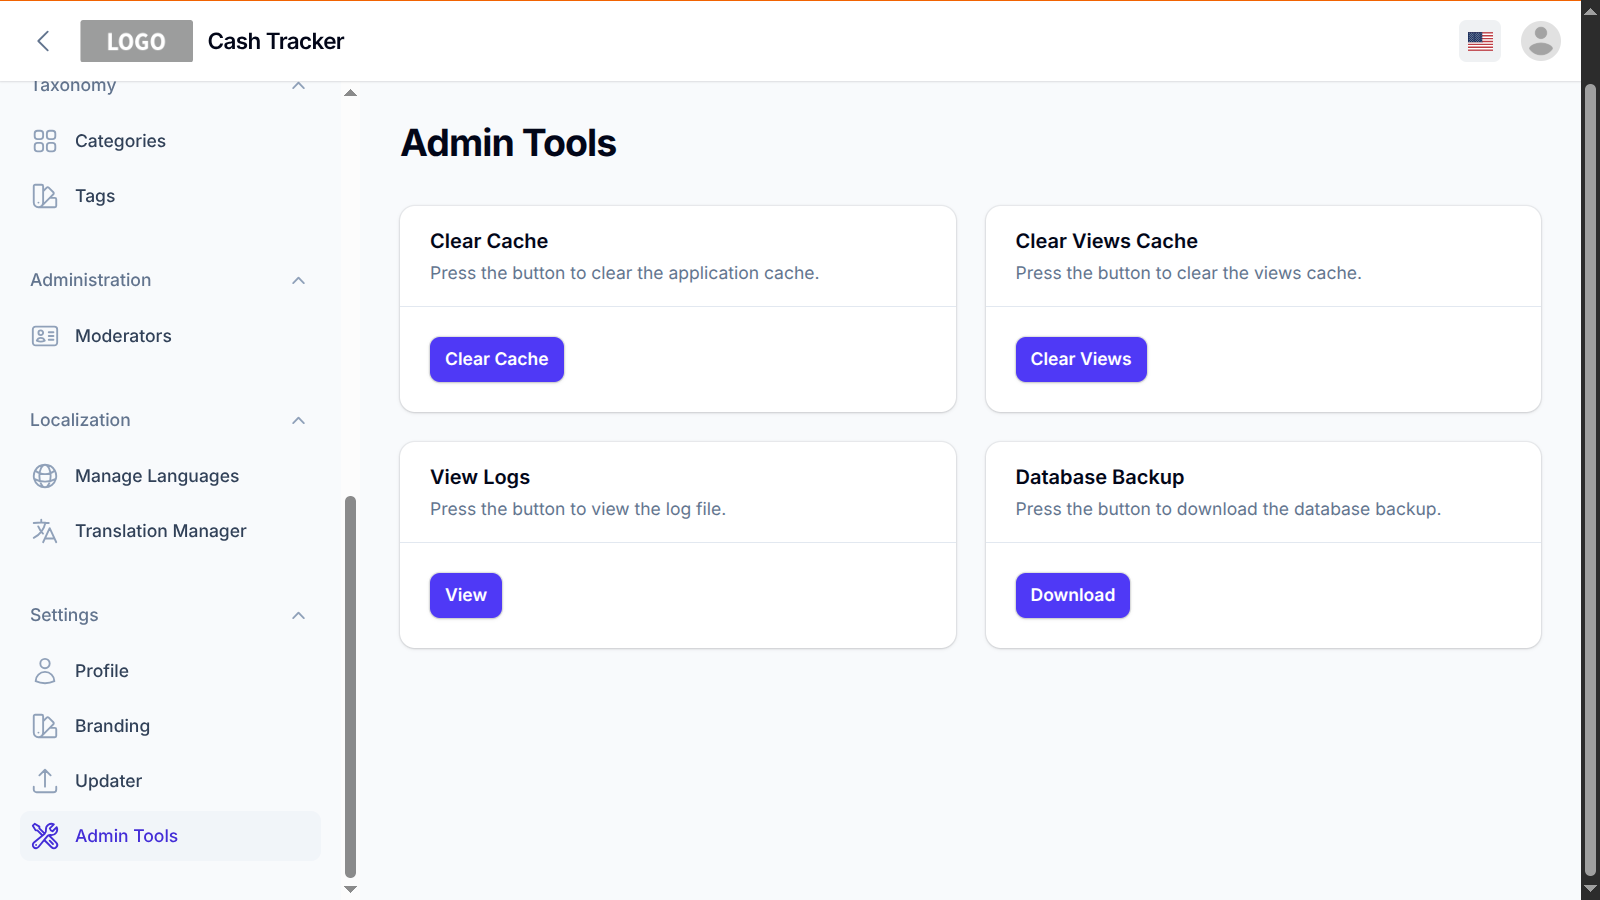
Cache
Cache tools can be used when troubleshooting cached application
data or when changes are not immediately reflected.
Logs
Application logs can be useful when investigating unexpected
errors or other application issues.
Database Backup
Regular database backups are recommended to protect your financial
data. A backup should also be created before performing major
maintenance or application updates.
Application Updates
The update system allows administrators to install a newer
application version using the provided update package. Always back
up the application and database before starting an update.
Security Recommendations:
Follow the recommended server and application security practices
to help protect your installation and financial data.
-
Change the default administrator credentials immediately after
installation.
- Use a strong and unique password.
- Keep the application and server software up to date.
- Perform regular database backups.
- Do not use 777 permissions.
- Keep application files outside the public web root.
- Only allow write access to directories that require it.
Proper permissions and regular backups are especially important
because the application stores financial information.
Additional Information:
The following information may be useful when using and customizing
the application.
Localization Fallback
The application supports multiple languages. If a translation is
not available for the currently selected language, the application
will automatically fall back to the default English translation.
This ensures that missing translations do not result in empty
labels or missing interface text. You can add or update
translations from the Localization section when needed.
No External Service Dependencies
The application does not depend on external services or
third-party platforms to provide its core functionality.
For example, the application does not require an external email
provider, payment gateway, AI service, or other third-party API to
manage your financial data and use the main features of the
application.
This allows the application to operate independently on your own
hosting environment without requiring additional service
subscriptions or API credentials.
Data Tables
Throughout the application, data is presented in tables where
appropriate. Depending on the type of data and available actions,
tables may provide tools for managing and exploring records.
Tables that support these features allow you to:
- View records and their details.
- Edit existing records.
- Search for specific records.
- Filter records using available filters.
- Sort records by supported columns.
- Navigate through multiple pages of records.
Available actions vary depending on the resource and the
permissions of the currently authenticated user.
Explore the Dashboard
After completing the initial setup, it is recommended that you
spend some time exploring the dashboard before entering your
actual financial data.
The dashboard provides an overview of the application's main
features and gives you a quick way to access accounts,
transactions, contacts, currencies, and other parts of the
application.
Creating a few test records can also help you understand how
income, expenses, transfers, account balances, categories, and
dashboard summaries work together.
Once you are familiar with the workflow, you can begin entering
your actual financial information.
Troubleshooting:
If you encounter an unexpected error, first verify that your
server meets the requirements listed in this documentation and
that the application files have the correct permissions.
Common installation issues include incorrect database credentials,
insufficient directory permissions, missing PHP extensions, cached
configuration, and incorrect application URLs.
If the application displays a server error, check the application
logs for additional information.
If the issue cannot be resolved, contact support and include the
application version, PHP version, server environment, and the
complete error message.
Support:
If you need assistance with installation, configuration, or an
issue that is not covered in this documentation, please feel free
to contact me at westiti@gmail.com. I will be
happy to help you.
When contacting support, provide the relevant error message and
details about your server environment so the issue can be
investigated more efficiently.
Thank you for purchasing the script, and best of luck with your
project!